Chemical etching is an interesting process that is often used by manufacturers to cut out intricately detailed shapes from various kinds of metals. It is done by spraying part of a metal with or immersing it into some kind of ‘temperature-regulated’ chemicals which can then help in giving the metal the desired shape. Although widely used, it is a step by step process and anyone who wishes to learn it should know about all these steps in detail.
For many manufacturers and inventors, this process can seem a bit too much. In such scenarios it is advisable to get one’s metal etched by the services of someone else who has a good hold of how to do that. These days there are specific companies, both offline and online, that provide metal etching services to help shape it in the way the customers want. One such website that provides chemical etching services is metaletching.com.
Chemical etching is a very valuable technique that can be utilised by many people, including scientists, innovators, manufacturers, and even metal artists. This makes it a rather frequent procedure in a variety of metal-using sectors. Although the process appears to be lengthy, it does not involve many complicated phases. It is pretty straightforward to recall and do the procedures in the correct order, especially if the entire process is well understood. In general, to know about the intricacies of the process, one can look at the step by step guide of it as given further:
Step 1: Know the Material
Before deciding to apply metal etching to a metal, the first step is to make sure whether the metal one wants to apply the technique to is etching friendly. So, it becomes important to identify the metal that one is going to etch. Certain materials that can be etched are copper, the alloys of copper, steel, stainless steel, aluminium, titanium, and nickel silver. If the material one is deciding to apply the technique on is one of these then one can continue with the process.
Step 2: Clean the Metal
Before using any kind of chemical treatment on the material, it is important to assure that the metal, along with all the other tools needed to complete this technique, is clean. Here, cleaning the metal means cleaning it properly by using a good chemical based cleanser and removing all the debris. This stage greatly paves the way for the next step.
Step 3: Laminate
Now that the metal is clean, the next stage can include laminating the same with a light-sensitive photoresist. During this stage, one needs to make sure that the lamination is done well and there is no gap or debris between the photoresist and the material. This stage helps in ensuring that the metal is not unnecessarily harmed by the chemical.
Step 4: Marking the Design

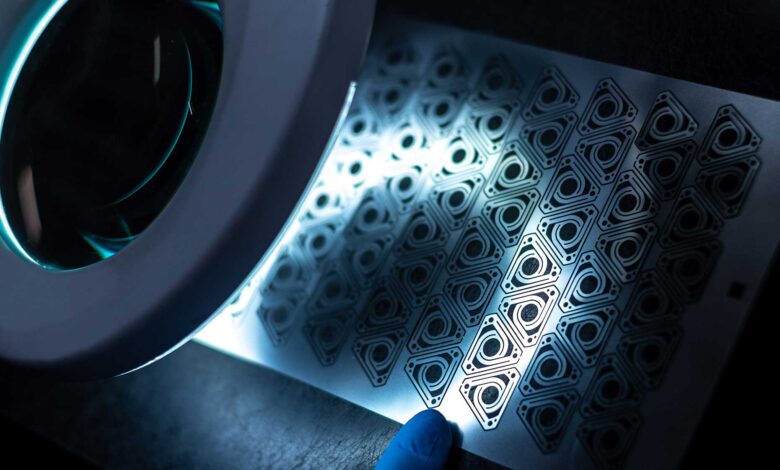
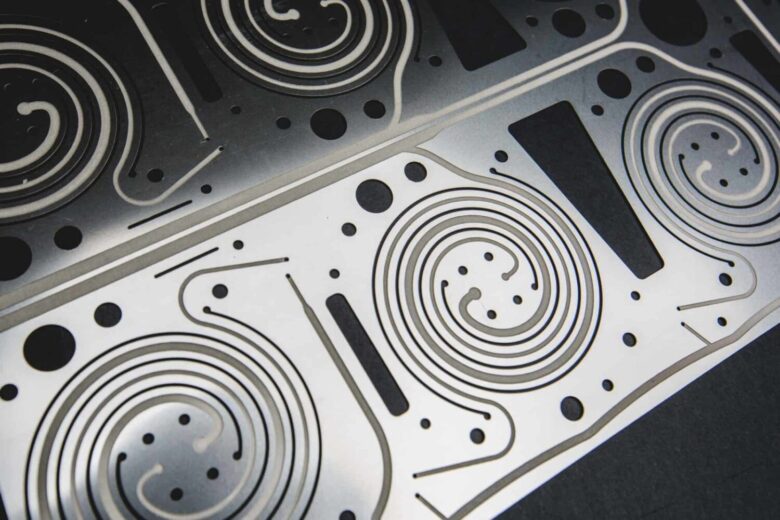
The next step includes marking of the design to be made on the piece. This process is also referred to as printing or imprinting of the design on the object to be shaped. This is done by using UV light that is made to pass through a photo-tool mask. This thus helps in imprinting the design. The design can also be very detailed since chemical processes such as this work even on intricate designs.
Step 5: Removing the Excess Photoresist Sheet
After the previous step, some part of the photoresist sheet, that is the part that needs to be etched, would have become hardened and the rest of the photoresist should hence be removed and the hardened part should be kept as it is. It will help in protecting the piece from being unnecessarily scratched during the process of etching.
Step 6: Etching of the Metal
This stage is the most important part of the process. It includes the actual etching of the metal by exposing it to a chemical substance called an etchant. The most commonly used etchant is ferric chloride. The piece is exposed to the chemical either by spraying it with the chemical or immersing it in it. After spraying it with the etchant, one has to wait for a certain period of time to ensure that the etching is done properly.
The amount of time one needs to wait for depends on a lot of factors like the material used, the enchant used, the size and the thickness of it, etc.
Step 7: Removing the Rest of Photoresist
After the main etching procedure is done, one can remove the remaining photoresist from the metal to expose the final etched metal piece.
Step 8: Ensure That the Etching is Done Well
The final step is all about inspection. After removing the remaining photoresist sheet from the piece, it is important to examine it to ensure that the etching process has gone well.
Conclusion
Chemical etching is a very useful technique that can be used by many people like scientists, inventors, manufacturers and even artists who use metal as a medium. This makes it a pretty common practice across various fields that use metal. Although the process may seem like a lot, it does not follow a lot of confusing steps. It is fairly simple to remember and do the steps in the correct order especially if one has got a good hold of the whole process. But where things can get tricky is the intricacy that one should work with while doing these processes.
All the steps are dependent on the one done before them, hence all of them become equally important to obtain a perfectly etched piece of metal. One needs to ensure that the lamination done is perfect and there are no bubbles or debris included, one should ensure that the design is well aligned during the process of imprinting it onto the metal. Besides this one should be careful while using a chemical like ferric chloride and should be aware of the time that one should leave it on for, finally ensuring that the process is done perfectly is important while examining it.